Working with the Natural Language Processor
We have seen how the Natural Language Processor (NLP) uses a pipeline of components to analyze the query. MindMeld encapsulates this pipeline in a higher-level abstraction, in the form of the NaturalLanguageProcessor Python class, or NLP class. This chapter focuses on the NLP class, while subsequent chapters examine each individual component of the pipeline.
Note
- This is an in-depth tutorial to work through from start to finish. Before you begin, read the Step-by-Step Guide, paying special attention to Step 7.
- This section requires the Home Assistant blueprint application. To get the app, open a terminal and run
mindmeld blueprint home_assistant.
Instantiate the NLP class
Working with the natural language processor falls into two broad phases:
- First, generate the training data for your app. See Step 6.
- Then, conduct experimentation in the Python shell.
When you are ready to begin experimenting, import the NaturalLanguageProcessor class from the MindMeld nlp module and instantiate an object with the path to your MindMeld project.
from mindmeld.components.nlp import NaturalLanguageProcessor
nlp = NaturalLanguageProcessor(app_path='home_assistant')
nlp
<NaturalLanguageProcessor 'home_assistant' ready: False, dirty: False>
The natural language processor automatically infers the domain-intent-entity-role hierarchy for your app based on the project structure. Inspect the domains attribute of the nlp object to view the list of domains it identified.
nlp.domains
{
 'smart_home': <DomainProcessor 'smart_home' ready: False, dirty: False>,
 'times_and_dates': <DomainProcessor 'times_and_dates' ready: False, dirty: False>,
 'unknown': <DomainProcessor 'unknown' ready: False, dirty: False>,
 'weather': <DomainProcessor 'weather' ready: False, dirty: False>
}
View the list of intents for each of the domains.
nlp.domains['times_and_dates'].intents
{
 'change_alarm': <IntentProcessor 'change_alarm' ready: False, dirty: False>,
 'check_alarm': <IntentProcessor 'check_alarm' ready: False, dirty: False>,
 'remove_alarm': <IntentProcessor 'remove_alarm' ready: False, dirty: False>,
  'set_alarm': <IntentProcessor 'set_alarm' ready: False, dirty: False>,
 'start_timer': <IntentProcessor 'start_timer' ready: False, dirty: False>,
 'stop_timer': <IntentProcessor 'stop_timer' ready: False, dirty: False>
}
...
nlp.domains['weather'].intents
{'check_weather': <IntentProcessor 'check_weather' ready: False, dirty: False>}
Upon initialization, the natural language processor merely scans the directory structure of your project, but does not read in the training data files. At this point in our tutorial, it has no knowledge of the entities associated with each intent.
nlp.domains['weather'].intents['check_weather'].entities
{}
The NLP learns about the entities when labeled queries are loaded at model training time. Once training is finished, you can use the entities attribute to view the entity types identified for each intent. The code snippet below introduces the NaturalLanguageProcessor.build() method for model training. This method can take several minutes to run.
nlp.build()
nlp.domains['weather'].intents['check_weather'].entities
{
 'city': <EntityProcessor 'city' ready: True, dirty: True>,
 'sys_interval': <EntityProcessor 'sys_interval' ready: True, dirty: True>,
 'sys_time': <EntityProcessor 'sys_time' ready: True, dirty: True>,
 'unit': <EntityProcessor 'unit' ready: True, dirty: True>
}
The ready and dirty attributes further describe the status of an NLP object.
The ready flag indicates whether the NLP instance is ready to process user input. Its value is True only if all the NLP classification models have been trained and can be used for making predictions on new queries.
nlp.ready
False
The dirty flag indicates whether the NLP object has changed since last loaded from or written to disk. Its value is True if the models have been retrained since the last disk I/O operation.
nlp.dirty
False
So far in our tutorial, the NLP object has been initialized but has not yet been trained, so ready and dirty are both false.
Train the NLP pipeline
As described in Step 7, the NaturalLanguageProcessor.build() method is the fastest way to train a baseline natural language processor. Depending on the complexity of your MindMeld project and the size of its training data, this can take anywhere from a few seconds to several minutes. With logging level set to INFO or below, you should see the build progress in the console along with cross-validation accuracies for the classifiers.
from mindmeld import configure_logs; configure_logs()
from mindmeld.components.nlp import NaturalLanguageProcessor
nlp = NaturalLanguageProcessor(app_path='food_ordering')
nlp.build()
Fitting intent classifier: domain='ordering'
Loading queries from file ordering/build_order/train.txt
Loading queries from file ordering/exit/train.txt
Loading queries from file ordering/greet/train.txt
Loading queries from file ordering/help/train.txt
Loading queries from file ordering/place_order/train.txt
Loading queries from file ordering/start_over/train.txt
Loading queries from file ordering/unsupported/train.txt
Selecting hyperparameters using k-fold cross validation with 10 splits
Best accuracy: 98.25%, params: {'C': 100, 'class_weight': {0: 1.5061564059900165, 1: 3.0562737642585551, 2: 0.9076278290025146, 3: 4.5641176470588229, 4: 2.5373456790123461, 5: 1.7793877551020409, 6: 0.47226711026615975}, 'fit_intercept': True}
...
Fitting entity recognizer: domain='ordering', intent='build_order'
Selecting hyperparameters using k-fold cross validation with 5 splits
Best accuracy: 92.82%, params: {'C': 100, 'penalty': 'l1'}
...
The build() method loads all the training queries, checks them for annotation errors, then proceeds to build all the necessary NLP components using the machine learning settings defined in config.py, the app's configuration file. The method applies MindMeld's preset configuration for any component whose settings have not been specified.
In so doing, the build() method:
- Calls the
fit()method on the classifiers in the domain-intent-entity-role hierarchy to train them using the provided model, feature, and hyperparameter settings- Builds the Entity Resolver using the provided entity mapping file
- Configures the Language Parser using the provided parser configuration file
These steps are described further in upcoming chapters, along with default settings for each component, and methods to override them with your own custom configurations.
To identify the optimal configuration for each classifier, you should experiment by training, tuning and testing. Then, store the best machine learning settings in config.py, for the build() method to use instead of the MindMeld defaults.
Here's an example of a config.py file where custom settings optimized for the app override the default configurations for the domain and intent classifiers.
DOMAIN_CLASSIFIER_CONFIG = {
    'model_type': 'text',
    'model_settings': {
        'classifier_type': 'logreg'
    },
    'params': {
        'C': 10,
    },
    'features': {
        "bag-of-words": {
            "lengths": [1, 2]
        },
        "edge-ngrams": {"lengths": [1, 2]},
        "in-gaz": {},
        "exact": {"scaling": 10},
        "gaz-freq": {},
        "freq": {"bins": 5}
    }
}

INTENT_CLASSIFIER_CONFIG = {
    'model_type': 'text',
    'model_settings': {
        'classifier_type': 'logreg'
    },
    'params': {
        'C': 10,
        "class_bias": 0.3
    },
    'features': {
        "bag-of-words": {
            "lengths": [1, 2]
        },
        "edge-ngrams": {"lengths": [1, 2]},
        "in-gaz": {},
        "exact": {"scaling": 10},
        "gaz-freq": {},
        "freq": {"bins": 5}
    }
}
You will learn more about classifier configuration later in this chapter.
Training at different levels of the NLP hierarchy
While calling the build() method on the nlp object is the easiest way to build or rebuild all the classifiers, it can be time-consuming. Sometimes it is more efficient to only rebuild a subset of your classifiers. To do this, call the build() method at the appropriate level in the domain-intent-entity-role hierarchy.
For instance, the code below rebuilds the NLP models for one selected domain only, namely the times_and_dates domain of the home_assistant app.
from mindmeld import configure_logs; configure_logs()
from mindmeld.components.nlp import NaturalLanguageProcessor
nlp = NaturalLanguageProcessor(app_path='home_assistant')
nlp.domains['times_and_dates'].build()
Fitting intent classifier: domain='times_and_dates'
Loading queries from file times_and_dates/change_alarm/train.txt
Loading queries from file times_and_dates/check_alarm/train.txt
Loading queries from file times_and_dates/remove_alarm/train.txt
Loading queries from file times_and_dates/set_alarm/train.txt
Loading queries from file times_and_dates/start_timer/train.txt
Loading queries from file times_and_dates/stop_timer/train.txt
Selecting hyperparameters using k-fold cross validation with 10 splits
Best accuracy: 99.33%, params: {'C': 100, 'class_weight': {0: 1.0848387096774192, 1: 1.2278761061946901, 2: 0.8924193548387096, 3: 0.81719056974459714, 4: 1.3213541666666666, 5: 6.665}, 'fit_intercept': False}
Fitting entity recognizer: domain='times_and_dates', intent='set_alarm'
Selecting hyperparameters using k-fold cross validation with 5 splits
Best accuracy: 98.08%, params: {'C': 1000000, 'penalty': 'l2'}
Fitting entity recognizer: domain='times_and_dates', intent='change_alarm'
Selecting hyperparameters using k-fold cross validation with 5 splits
Best accuracy: 97.23%, params: {'C': 100, 'penalty': 'l2'}
Fitting entity recognizer: domain='times_and_dates', intent='start_timer'
Selecting hyperparameters using k-fold cross validation with 5 splits
Best accuracy: 98.95%, params: {'C': 100, 'penalty': 'l1'}
Fitting entity recognizer: domain='times_and_dates', intent='check_alarm'
Selecting hyperparameters using k-fold cross validation with 5 splits
Best accuracy: 97.18%, params: {'C': 1000000, 'penalty': 'l1'}
To specify a level in the domain-intent-entity-role when invoking the build() method, choose one of the following patterns:
nlp.build()
Trains all the classifiers in the NLP pipeline.
nlp.domains['d_name'].build()
Trains the intent classifier for thed_namedomain, the entity recognizers for all the intents underd_name, and the role classifiers for all the entity types contained within those intents.
nlp.domains['d_name'].intents['i_name'].build()
Trains the entity recognizer for thei_nameintent, and the role classifiers for all the entity types in this intent.
nlp.domains['d_name'].intents['i_name'].entities['e_name'].build()
Trains the role classifier fore_nameentity type.
More about fine-grained access to individual classifiers appears in the subsequent chapters.
Building models incrementally
The NaturalLanguageProcessor.build() method by default retrains all NLP models from scratch. In most cases, however, you may just be modifying the configuration, training data, or resources (like gazetteers) of certain specific models within the NLP pipeline. In such cases, MindMeld can intelligently retrain only those models whose dependencies have changed and simply reuse the previous models for the ones that haven't. To do so, set the incremental parameter of the build() method to True.
nlp.build(incremental=True)
Loading queries from file smart_home/check_door/custom_test.txt
Loading queries from file smart_home/check_lights/custom_test.txt
.
.
No need to fit. Loading previous model.
Loading domain classifier
Fitting intent classifier: domain='smart_home'
No need to fit. Loading previous model.
.
.
No need to fit. Loading previous model.
Loading entity recognizer: domain='smart_home', intent='turn_appliance_off'
Classifier configurations
We have seen how the natural language processor's build() method and the individual classifiers' fit() methods use configurations to train models.
To be more precise, a classifier configuration defines the machine learning algorithm to use, the features to be extracted from the input data, and the methodology to use for hyperparameter selection.
MindMeld domain, intent, entity, and role classifiers all use a configuration dictionary to define the machine learning settings for model training.
This section describes the structure and format of the configuration dictionary. Detailed explanation of configurable options for each type of classifier appears in subsequent chapters.
Anatomy of a classifier configuration
A classifier configuration has three sections: Model Settings, Feature Extraction Settings, and Hyperparameter Settings.
- Model Settings - The machine learning algorithm or modeling approach to use, along with any algorithm-specific settings.
This snippet from a domain classifier configuration specifies a 'text classifier' to be trained using a 'logistic regression' model.
'model_type': 'text',
'model_settings': {
   'classifier_type': 'logreg',
},
...
This example, from entity recognition, specifies 'maximum entropy markov model' as the machine learning algorithm and the 'Inside-Outside-Beginning' format as the tagging scheme. It further specifies the 'maximum absolute scaling' feature transformation operation as a preprocessing step.
'model_type': 'memm',
'model_settings': {
   'tag_scheme': 'IOB',
   'feature_scaler': 'max-abs'
},
...
- Feature Extraction Settings - The features to extract from the input query, along with any configurable settings for each feature group.
These feature extraction settings are from a domain classifier configuration.
...
'features': {
   'bag-of-words': {'lengths': [1]},
   'in-gaz': {},
   'freq': {'bins': 5},
   'length': {}
}
...
The above configuration instructs MindMeld to extract four different groups of features for each input query:
- 'Bag of n-grams' of length 1 (also called 'bag of words')
- Gazetteer-derived features
- Token frequency-based features, quantized into 5 bins
- Features derived from the query length
- Hyperparameter Settings - The hyperparameters to use during model training, or the settings for choosing optimal hyperparameters.
This role classifier configuration defines hyperparameters for its maximum entropy classification model. It specifies a value of 100 for the 'C' parameter and 'L1' as the norm to be used for regularization.
...
'params': {
   'C': 100,
   'penalty': 'l1'
}
You can also provide a hyperparameter grid instead of exact values and let MindMeld search for optimal settings. This type of configuration must specify both the hyperparameter search grid and settings for the selection methodology, as shown below.
...
'param_selection': {
   'type': 'k-fold',
   'k': 10,
   'grid': {
     'C': [10, 100, 1000, 10000, 100000],
     'penalty': ['l1', 'l2']
   },
 }
The above configuration defines a grid with five potential values for the 'C' parameter and two possible values for the 'penalty' parameter. It also specifies that optimal values need to be found using a 10-fold cross-validated grid search over the provided parameter grid.
Using custom configurations
There are two ways to override MindMeld's preset configurations for NLP classifiers.
The first method, as described earlier, is to define the classifier settings in your application configuration file, config.py. The classifier configuration must be defined as a dictionary with one of the following names to override the corresponding classifier's default settings.
DOMAIN_CLASSIFIER_CONFIGINTENT_CLASSIFIER_CONFIGENTITY_RECOGNIZER_CONFIGROLE_CLASSIFIER_CONFIG
These classifier configurations apply globally to every domain, intent, entity and role model trained as part of your NLP pipeline. There are certain situations where you might want a finer-grained control over the classifier settings for every individual model. For instance, you may find that an LSTM-powered entity recognizer is the optimal choice for detecting entities within one intent, but a MEMM model works better for a different intent. Similarly, you may want a decision tree-based intent model for one domain but a logistic regression model for another. Or you may want to specify that certain data files be included or excluded while training a particular intent or entity model. You can define such specialized configurations based on the domain, intent, and entity type through the get_intent_classifier_config(), get_entity_recognizer_config(), and get_role_classifier_config(). Examples on how to use these methods are shown in the sections for the individual classifiers.
Alternatively, you could pass configuration settings (like model type, features, and so on) as arguments to the fit() method of the appropriate classifier. Arguments passed to fit() take precedence over both MindMeld defaults and settings defined in config.py. See individual classifier chapters for more about the fit() method.
Configuring rest of the pipeline
Since neither the entity resolver nor the language parser are supervised classifiers, they are configured differently from the rest of the NLP pipeline. See Working with the Entity Resolver and Working with the Language Parser, respectively, to learn how to configure these components.
Run the NLP pipeline
Run the trained NLP pipeline on a test query using the NaturalLanguageProcessor.process() method. The process() method sends the query for sequential processing by each component in the NLP pipeline and returns the aggregated output from all of them.
nlp.process("I'd like a mujaddara wrap and two chicken kebab from palmyra")
{
 'domain': 'ordering',
 'entities': [
   {
     'role': None,
     'span': {'end': 24, 'start': 11},
     'text': 'mujaddara wrap',
     'type': 'dish',
     'value': [{'cname': 'Mujaddara Wrap', 'id': 'B01DEFNIRY'}]
   },
   {
     'role': None,
     'span': {'end': 32, 'start': 30},
     'text': 'two',
     'type': 'sys_number',
     'value': {'value': 2}
   },
   {
     'children': [
       {
         'role': None,
         'span': {'end': 32, 'start': 30},
         'text': 'two',
         'type': 'sys_number',
         'value': {'value': 2}
       }
     ],
     'role': None,
     'span': {'end': 46, 'start': 34},
     'text': 'chicken kebab',
     'type': 'dish',
     'value': [{'cname': 'Chicken Kebab', 'id': 'B01DEFMUSW'}]
   },
   {
     'role': None,
     'span': {'end': 59, 'start': 53},
     'text': 'palmyra',
     'type': 'restaurant',
     'value': [{'cname': 'Palmyra', 'id': 'B01DEFLJIO'}]
   }
 ],
 'intent': 'build_order',
 'text': "I'd like a mujaddara wrap and two chicken kebab from palmyra"
}
The return value is a dictionary, as described in the table below.
| Key | Value | Component(s) Responsible |
|---|---|---|
| domain | The predicted domain label for the query | Domain Classifier |
| entities | A list of the entities recognized in the query, with each entity represented as a dictionary containing entity-specific properties like detected text span, entity type, role type, resolved value, children (dependents), etc. | Entity Recognizer, Role Classifer, Entity Resolver, Language Parser |
| intent | The predicted intent label for the query | Intent Classifier |
| text | The input query text |
The process() method executes the following steps:
- Call the
predict()(or equivalent) method for each classifier in the domain-intent-entity-role hierarchy to detect the domain, intent, entities and roles in the query- Call the Entity Resolver's
predict()method to resolve all detected entities to their canonical forms- Call the Language Parser's
parse_entities()method to cluster the resolved entities- Return the detailed output from each component
For more about the above steps, including outputs and methods for batch testing and evaluation, see the chapters on individual NLP components.
Specifying request timestamp and time zone
For applications dealing with temporal events, you can specify the timestamp and time zone for each query to modify the default behavior of the NLP pipeline. This information affects how certain system entities get resolved in MindMeld.
To pass in this information, use these two optional parameters of the process() method:
time_zone: The name of an IANA time zone, such as 'America/Los_Angeles', or 'Asia/Kolkata'timestamp: A valid unix timestamp for the current query
We illustrate the use of these parameters below with some examples from the home assistant blueprint. By default, the natural language processor infers time-related system entities using the timestamp at which the process() method was invoked and the time zone of the server where the MindMeld app is running.
The following code snippet was executed on the morning of May 11th, 2018 in the PDT (UTC-7:00) time zone.
nlp.process('Set an alarm for noon')
    { 'domain': 'times_and_dates',
      'entities': [ { 'role': None,
                      'span': {'end': 20, 'start': 17},
                      'text': 'noon',
                      'type': 'sys_time',
                      'value': [ { 'grain': 'hour',
                                   'value': '2018-05-11T12:00:00.000-07:00'}]}],
      'intent': 'set_alarm',
      'text': 'Set an alarm for noon'
    }
Observe how the NLP output for the same query changes when 'Asia/Kolkata' (UTC+5:30) is specified as the time_zone.
nlp.process('Set an alarm for noon', time_zone='Asia/Kolkata')
    { 'domain': 'times_and_dates',
      'entities': [ { 'role': None,
                      'span': {'end': 20, 'start': 17},
                      'text': 'noon',
                      'type': 'sys_time',
                      'value': [ { 'grain': 'hour',
                                   'value': '2018-05-11T12:00:00.000+05:30'}]}],
      'intent': 'set_alarm',
      'text': 'Set an alarm for noon'
    }
Use the time_zone parameter in your calls to the NaturalLanguageProcessor.process() method to ensure that your application behaves and responds appropriately for all your users regardless of their time zone.
Next, we demonstrate the use of the timestamp parameter to reproduce how the NLP pipeline would have processed this query on the midnight (UTC) of January 1st, 2018, which corresponds to the Unix timestamp 1514764800.
nlp.process('Set an alarm for noon', timestamp=1514764800, time_zone='Europe/London')
    { 'domain': 'times_and_dates',
      'entities': [ { 'role': None,
                      'span': {'end': 20, 'start': 17},
                      'text': 'noon',
                      'type': 'sys_time',
                      'value': [ { 'grain': 'hour',
                                   'value': '2018-01-01T12:00:00.000+00:00'}]}],
      'intent': 'set_alarm',
      'text': 'Set an alarm for noon'
    }
Use the timestamp parameter in conjunction with the time_zone parameter to ensure consistent responses when writing tests and inspecting how the NLP would respond at specific points of time.
Evaluate NLP performance
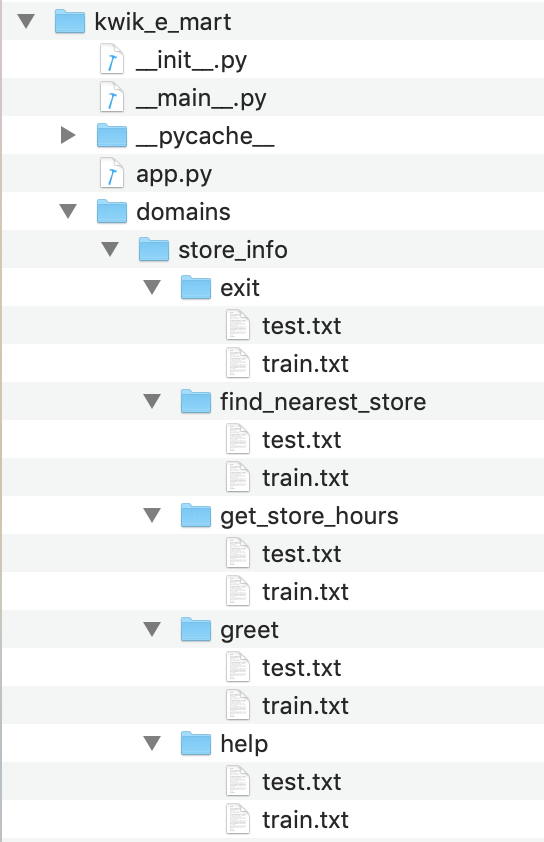
The cross-validation accuracies for each classifier, reported during model training, can be good initial indicators of your NLP pipeline's performance. However, the true measure of a machine-learned system's real-world performance is its accuracy on previously unseen test data. The test data is a set of labeled queries prepared in the same manner as the training data. Names of files containing test queries have the prefix test. These files are placed within the intent subfolders, alongside the training data files.
While training data is used for training and tuning the models, test data is used solely for model evaluation. Ideally, the test data should have no queries in common with the training data and be representative of the real-world usage of the app. During evaluation, the ground truth annotations are stripped away from the test queries and the unlabeled queries are passed in to a trained classifier. The classifier's output predictions are then compared against the ground truth labels to measure the model's prediction accuracy. A successful production-grade conversational app must achieve test accuracies greater than 90% for all the classification models in its NLP pipeline.
Run the trained NLP pipeline on the test data using the NaturalLanguageProcessor.evaluate() method. The evaluate() method sends each query in the test data through sequential processing by each component in the NLP pipeline and returns the aggregated accuracy and statistics from all of them.
nlp.evaluate()
Intent classification accuracy for the 'store_info' domain: 0.9830508474576272
Entity recognition accuracy for the 'store_info.get_store_hours' intent: 0.7941176470588235
To get more detailed statistics on each of the classification models in addition to the accuracy, you can use the flag print_stats=True.
nlp.evaluate(print_stats=True)
Intent classification accuracy for the 'store_info' domain: 0.9830508474576272
Overall statistics:

    accuracy f1_weighted          tp          tn          fp          fn    f1_macro    f1_micro
       0.983       0.983         116         470           2           2       0.976       0.983


Statistics by class:

               class      f_beta   precision      recall     support          tp          tn          fp          fn
                exit       1.000       1.000       1.000          15          15         103           0           0
  find_nearest_store       0.960       0.923       1.000          12          12         105           1           0
     get_store_hours       0.985       1.000       0.971          34          33          84           0           1
               greet       0.989       0.979       1.000          47          47          70           1           0
                help       0.947       1.000       0.900          10           9         108           0           1


Confusion matrix:

                          exit   find_neare..   get_store_..          greet           help
           exit             15              0              0              0              0
   find_neare..              0             12              0              0              0
   get_store_..              0              1             33              0              0
          greet              0              0              0             47              0
           help              0              0              0              1              9


Entity recognition accuracy for the 'store_info.get_store_hours' intent: 0.7941176470588235
Overall tag-level statistics:

    accuracy f1_weighted          tp          tn          fp          fn    f1_macro    f1_micro
       0.951       0.957         273        1134          14          14       0.787       0.951


Tag-level statistics by class:

               class      f_beta   precision      recall     support          tp          tn          fp          fn
                  O|       0.979       0.986       0.972         218         212          66           3           6
        B|store_name       0.981       1.000       0.963          27          26         260           0           1
        I|store_name       0.980       1.000       0.962          26          25         261           0           1
          B|sys_time       0.593       0.615       0.571          14           8         268           5           6
          I|sys_time       0.400       0.250       1.000           2           2         279           6           0


Confusion matrix:

                            O|   B|store_na..   I|store_na..     B|sys_time     I|sys_time
             O|            212              0              0              5              1
   B|store_na..              1             26              0              0              0
   I|store_na..              1              0             25              0              0
     B|sys_time              1              0              0              8              5
     I|sys_time              0              0              0              0              2


Segment-level statistics:

          le          be         lbe          tp          tn          fp          fn
           0           5           0          34          55           0           2


Sequence-level statistics:

 sequence_accuracy
             0.794
For more about how evaluation works for each individual classifier, see the evaluation sections of the respective chapters.
Optimize the NLP models
The typical experimentation flow for Machine Learning-based systems looks like this:
- Gather representative labeled data
- Train a baseline model
- Measure model performance using cross-validation or heldout dataset
- Perform error analysis on incorrect model predictions
- Apply insights from the analysis to improve model performance by appropriately updating the machine learning setup
In practice, optimizing the NLP models to production-level accuracies demands several iterations of this flow. During each round of experimentation, there are two primary ways to improve the model performance.
- Adding more training data: In most cases, model accuracy can be improved simply by adding more representative training data. Error analysis can help identify a relevant set of training queries to add. This helps the model generalize better and make more accurate predictions on the misclassified examples. Filling in gaps in the training data and improving the overall quality of labeled queries should always be the first step when debugging classifier performance.
- Optimizing the classifier configuration: Accuracy can also be improved by selecting a classifier configuration that is better suited for your training data. The natural language processor's
build()method uses a default configuration for each classifier to train the NLP models. While these baseline models provide a reasonable starting point for your NLP pipeline, experimenting with different model types, features, etc., could help identify alternate configurations that produce more accurate models. However, unlike training data augmentation, this more advanced approach requires expertise in applied machine learning to run meaningful experiments and identify optimal classifier settings. For details about configuration options available for each NLP classifier, see the respective chapters.
Select data for experiments
During the course of experimentation, it is common to have multiple datasets for training and testing as you iterate on building the most optimal models for your NLP pipeline. Multiple training datasets allow you to try out different versions of training data for fitting your models and identifying the best performing one. They are also useful for building and deploying different variants of your models trained on different datasets from the same MindMeld project.
Multiple testing datasets (or test sets) allow you to compute evaluation numbers on different versions of test data. A recommended practice is to have at least two different test sets in your project - a development set and a blind set. You should use the development set for frequent evaluation and error analysis to fine-tune your model's parameters and improve its performance. The blind set, on the other hand, should merely be used for computing the final evaluation metrics without being open for detailed investigation.
In MindMeld, a dataset is a collection of labeled query files that share the same filename prefix and are distributed across the different intent folders consistent with the MindMeld project structure. Each dataset is identified by a label which is the same as the common prefix shared by its constituent data files. By default, MindMeld uses all files within your intent folders that match the 'train*.txt' pattern for training and the 'test*.txt' pattern for testing. In other words, the NaturalLanguageProcessor.build() and NaturalLanguageProcessor.evaluate() methods use the datasets named 'train' and 'test' by default, respectively. To instead train or evaluate on a specific subset of files within your intent folders, use the label_set parameter of the build() and evaluate() methods to identify the desired dataset.
The code snippet below demonstrates how to train the NLP classifiers only using the 'custom_train' dataset (i.e., the subset of data that matches the 'custom_train*.txt' filename pattern):
nlp.build(label_set='custom_train')
Fitting domain classifier
Loading raw queries from file greeting/exit/custom_train.txt
Loading raw queries from file greeting/greet/custom_train.txt
Loading raw queries from file smart_home/check_door/custom_train.txt
Loading raw queries from file smart_home/check_lights/custom_train.txt
Loading raw queries from file smart_home/check_thermostat/custom_train.txt
.
.
Similarly, the following code snippet shows how to evaluate the NLP classifiers only using the 'custom_test' dataset (i.e., the test queries from files matching the 'custom_test*.txt' pattern):
nlp.evaluate(label_set='custom_test')
Loading queries from file smart_home/check_door/custom_test.txt
Loading queries from file smart_home/check_lights/custom_test.txt
Loading queries from file smart_home/check_thermostat/custom_test.txt
.
.
Entity recognition accuracy for the 'smart_home.turn_on_thermostat' intent: 1.0
Entity recognition accuracy for the 'times_and_dates.set_alarm' intent: 1.0
Save models for future use
Once you have trained an NLP pipeline and are satisfied with its accuracy, you can save it to disk using the NaturalLanguageProcessor.dump() method. The dump() method saves all the trained models to a cache folder within your MindMeld project.
nlp.dump()
Saving intent classifier: domain='ordering'
Saving entity recognizer: domain='ordering', intent='build_order'
...
The saved models can then be loaded anytime using the NaturalLanguageProcess.load() method.
nlp.load()
Loading intent classifier: domain='ordering'
...
Another option is to save just one specific NLP model, which is useful when you are actively experimenting with individual classifiers and want to checkpoint your work or save multiple model versions for comparison. This is done using the dump() and load() methods exposed by each classifier. Refer to the chapter for the appropriate classifier to learn more.
Tracking classifier progress
Training the NLU pipeline can be time-consuming depending on the number of models to be trained and the number of training examples for each of them. The following code snippet shows how you can do progress tracking while building your application. The progress bar will display the fraction of models that have been trained at any given time.
import mindmeld
import logging
from mindmeld.components.nlp import NaturalLanguageProcessor
from tqdm import tqdm

# Setting the logging level to ERROR prevents the tqdm progress bar from interleaving
# with other logging messages that are written to stdout.
mindmeld.configure_logs(level=logging.ERROR)

# Make sure the total parameter starts at 0 since the classifiers will increment the total as
# they get initialized
pbar = tqdm(total=0, desc="NLP progress")
nlp = NaturalLanguageProcessor(app_path='banking_assistant', progress_bar=pbar)
nlp.build()